

A breastfeeding workstation is a fixed spot with a supportive chair, a stable height-elevated nursing pillow, a footrest, and supplies within arm’s reach. The single biggest upgrade is the pillow: one that lifts your baby to breast height stops you hunching forward, and a randomised controlled trial found this kind of pillow measurably cuts maternal discomfort compared with feeding without one. Set it up once, sit back, and let your baby come to you.
TL;DR:
- Using a firm, shape-maintaining nursing pillow significantly reduces maternal discomfort and improves latch quality during breastfeeding.
- An ergonomic setup includes a supportive chair with lumbar support, a footrest, and positioning the baby to bring their nose level with the nipple for better alignment.
- Different breastfeeding positions require adaptable pillows, with side-lying and laid-back options easing neck and back strain, especially during long or frequent feeds.
- Proper maintenance involves weekly washing of pillow covers, daily cleaning of accessories, and keeping supplies within arm’s reach to ensure hygiene and convenience.
- Optimal lighting includes dim, warm nightlights for overnight feeds and natural daylight during the day to help monitor baby’s cues without disrupting sleep.
Table of Contents
- What goes into an ergonomic breastfeeding workstation setup
- How do you set up the pillow and seat for each feed?
- Cradle, cross-cradle, football, side-lying or laid-back: which position fits?
- What if you’re short on space, have larger breasts, or you’re feeding twins?
- Why does the setup feel wrong, and how do you fix it?
- How do you keep breastfeeding workstation items clean?
- What lighting works best for night and day feeds?
- Does room temperature affect breastfeeding comfort?
- How do you get privacy and quiet in a shared home?
- How do you avoid fatigue during long feeding sessions?
- What’s the best way to store breastfeeding supplies?
- A closer look at the ergonomics behind the setup
- Setting up your pillow the right way
- Sources
What goes into an ergonomic breastfeeding workstation setup
Before you touch a pillow, sort the chair. Look for arm support at elbow height, firm lumbar support, and a seat that lets your feet sit flat or on a footrest, not dangling or tucked under you. If your armchair is too deep, a firm cushion behind your lower back fixes it in seconds.
The pillow is the centrepiece, and firmness matters more than most new mums expect. Consumer Reports recommends firmer, flatter nursing pillows with adjustable straps because a soft, squishy pillow sinks under a baby’s weight and drops the lift you actually need. A pillow that keeps its shape under pressure means less mid-feed repositioning and a steadier latch.
Round out the space with:
- A footrest, ottoman, or low stool to raise your knees slightly above hip height
- Water within reach (feeding sessions run long, and dehydration sneaks up fast)
- A burp cloth, muslin wrap, and a couple of nappies close by
- A soft lamp for night feeds and a phone or clock so you can track feed times
- A small basket or caddy for nipple cream, breast pads, and a spare top
Never leave a baby unattended on a nursing pillow, even for a moment, and always stay within arm’s reach while it’s in use.
Pro Tip: Keep a second, smaller cushion nearby for propping your feeding arm once your baby settles. It stops your shoulder from creeping up towards your ear halfway through a 40-minute feed.
How do you set up the pillow and seat for each feed?
Getting the alignment right takes under a minute once it’s a habit. Here’s the order that works:
- Sit back fully in the chair so your lower back touches the lumbar support, not perched on the edge.
- Rest your feet flat or on a footrest, with knees roughly level with or slightly above your hips.
- Position the pillow flat across your lap, snug against your body, using the strap if it has one to stop it sliding as your baby feeds.
- Check the lift. You should not have to lean forward or round your shoulders to reach your baby. If you do, the pillow is too low or has compressed under weight.
- Bring your baby to the breast, not the other way round. Mayo Clinic’s positioning guidance uses the close enough to kiss rule: your baby’s nose should sit level with your nipple before you tuck them in, chin making contact first.
- Support your baby’s shoulders and neck, not just the head, so they can tilt back slightly to latch deeply.
This is the same principle ergonomics researchers describe as bringing the baby to the breast rather than the breast to the baby, and it’s the difference between a workstation that protects your neck and one that wrecks it by week three.
The evidence: a randomised trial using a U-shaped nursing pillow recorded higher LATCH scores among mothers who used one, with a mean difference of 0.48 (p = 0.027) at 48 hours postpartum. That’s a measurable latch improvement, not just a comfort perk.
Run through this quick check before every feed: back supported, feet grounded, pillow snug and level, baby’s chin leading in. If any one of those is off, fix it before you latch, not after.
Cradle, cross-cradle, football, side-lying or laid-back: which position fits?
Your workstation pillow should adapt to whichever position suits the day, not lock you into one.
- Cradle hold: baby lies along your forearm, tummy to tummy. The pillow supports your forearm at breast height so your shoulder stays relaxed instead of holding the weight itself.
- Cross-cradle: your opposite hand supports baby’s head and neck while the pillow carries the bulk of the weight. Good for newborns still working on latch, since you have a free hand to guide their chin.
- Football hold: baby tucks under your arm, facing you, feet pointing towards your back. The pillow sits beside you rather than across your lap, propping your baby to the side at breast level.
- Side-lying: you and baby lie facing each other in bed. No pillow needed under baby, but a pillow between your knees and one supporting your head keeps your spine neutral.
- Laid-back: you recline with baby on your chest, gravity doing most of the work. Useful when your neck or shoulders are already sore, since there’s no forward lean to manage.
Side-lying and laid-back are worth reaching for whenever your neck or back is complaining, because both remove the need to hold a feeding position for 20 to 40 minutes straight. Some lactation consultants also point out that a pillow can sometimes get in the way of full body contact needed for a deep latch, particularly in laid-back feeding, so don’t force one into every position. Recline slightly, drop the pillow, and let skin contact do the work when that’s what your baby responds to.
What if you’re short on space, have larger breasts, or you’re feeding twins?
A small bedroom or a tight apartment doesn’t rule out a proper setup. It just means picking gear that packs down.
- Small spaces: a portable, higher-lift pillow that doesn’t need a dedicated armchair works on a bed edge or a dining chair. A low step stool doubles as a footrest and stores under the bed.
- Larger breasts: you’ll usually need more elevation, not less, to bring baby level with the nipple without collapsing forward. The football hold often works better here than cradle, since it keeps breast tissue clear of baby’s nose without you having to hold it back manually.
- Tandem or twin feeding: a firm, wide pillow that supports both babies at once beats two separate cushions, which tend to slide apart mid-feed.
- Post-caesarean recovery: side-lying avoids pressure on the incision entirely, and a pillow across the lap should sit above the scar line, not resting on it.
Pro Tip: If you’ve had a caesarean, keep a slim pillow within reach purely to place across your abdomen before you cough, laugh, or shift position. It’s a small thing that saves a lot of wincing.
Why does the setup feel wrong, and how do you fix it?
Most feeding discomfort traces back to one of three fixable problems, not a faulty pillow. For nursing parents concerned about care and safety, see whitening strips while breastfeeding for important information to protect both you and your baby.
- Baby keeps sliding or slumping: the pillow has likely lost firmness or wasn’t snug to begin with. Tighten the strap if there is one, or slip a folded towel underneath to restore lift. A pillow that compresses heavily under weight loses its effective height fast, which is exactly the problem a firmer, higher compression resistant pillow is built to avoid.
- Shallow latch despite a good setup: try the laid-back method instead, or slide baby further along the pillow so the chin makes contact with the breast before the nose does.
- Pain that won’t settle after a week of adjustments: rotate through two or three positions rather than repeating the one that hurts, and add a lumbar cushion behind your own back. Persistent pain that doesn’t ease with position changes is worth raising with a lactation consultant or physiotherapist. Ergonomic training combined with positioning support has been shown to reduce musculoskeletal complaints in breastfeeding mothers, and a professional can spot what a checklist can’t.
Constant repositioning during a feed is the clearest sign your pillow lacks the height or stability your body needs, not a sign you’re doing something wrong.
How do you keep breastfeeding workstation items clean?
Everything within reach of a feeding baby needs a simple, repeatable cleaning routine, because this corner of the house gets used multiple times a day.
Wash your nursing pillow cover weekly at minimum, more often if there’s spit up or leaked milk involved. A pillow with a removable, machine washable cover makes this painless. Look for one that can go through a normal cycle without needing special detergent or a delicate setting, since you won’t want to hand wash it at 2am. Wipe down the pillow’s inner core with a damp cloth if it isn’t washable itself, and let it air dry fully before the next use, since trapped moisture breeds mould in foam fillings.
Burp cloths and muslin wraps should get rotated daily into the wash, not reused for days on end. Keep a small stash of at least five or six so you’re never caught without a clean one mid feed. Wipe the arms of your feeding chair weekly with a mild cleaner, particularly if you’re using nipple cream or expressing near it. Rinse your water bottle daily rather than just refilling it, and give your feeding lamp a dust every couple of weeks since it tends to get ignored.
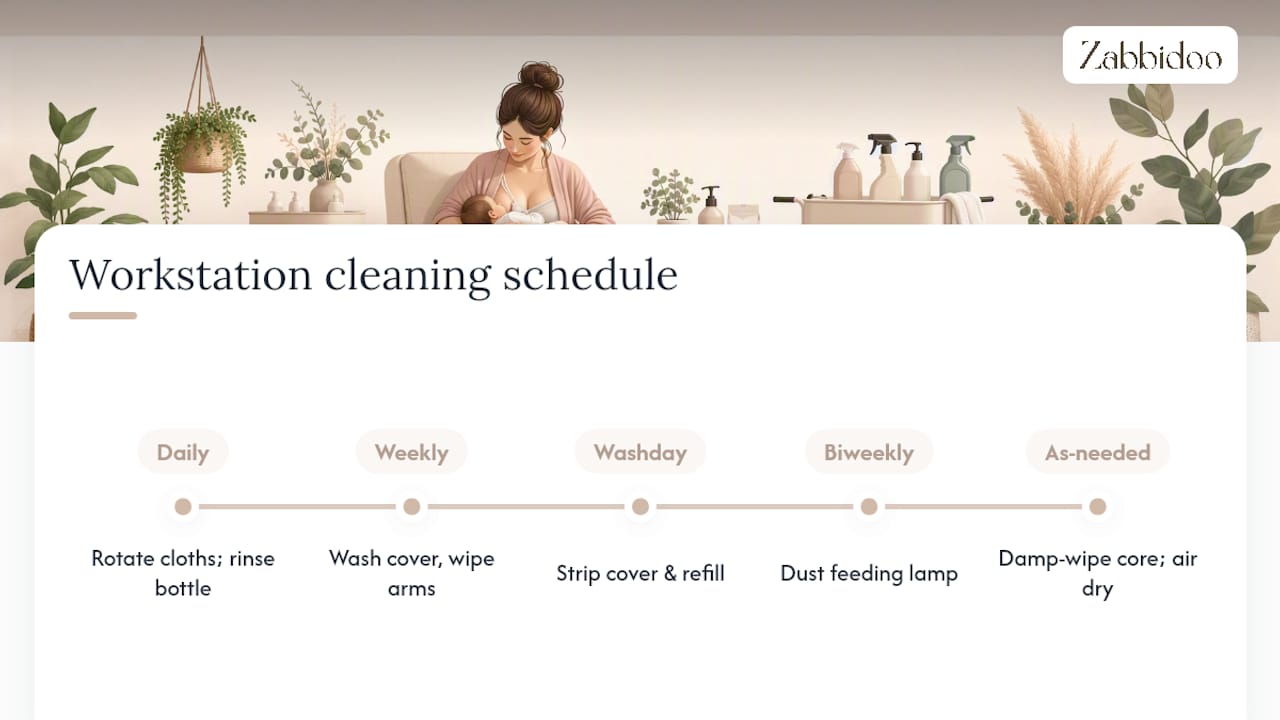
Set a simple weekly habit: strip the pillow cover on wash day, refill the supply basket, and give the whole corner a five-minute wipe down. It keeps the space feeling fresh rather than lived-in in the wrong way, and it means you’re never troubleshooting a hygiene problem in the middle of a 3am feed.
What lighting works best for night and day feeds?
Bright overhead light works against you at night and does little for you during the day either. For overnight feeds, a soft, dimmable lamp positioned beside your chair lets you check your baby’s latch without fully waking either of you. Warm toned bulbs, the kind labelled 2700K or lower, disrupt sleep hormones less than the cool white light most main bedroom fittings use.
During the day, natural light near a window is genuinely useful, since it helps you spot subtle cues like colour changes in your baby’s face or lips that a dim room hides. Position your chair so light falls across your baby’s face rather than into your eyes, since a bright window behind your baby forces you to squint just when you need to watch closely for a good latch.
If you feed in a nursery or bedroom overnight, a plug in nightlight with a warm glow, left on low, saves you from fumbling for a switch with a hungry baby in your arms. Motion sensor lights are handy in hallways leading to the feeding spot but avoid one directly at the chair. It flicking on and off as you shift position gets old fast.
The goal is enough light to check latch and skin colour safely, without light so harsh it becomes another thing keeping you both awake.
Does room temperature affect breastfeeding comfort?
A room that’s too warm makes both of you sweaty and irritable within minutes, and a baby who’s uncomfortably hot often feeds poorly or pulls off repeatedly. Most nurseries and feeding corners sit comfortably between 18 and 22 degrees Celsius, cooler than many parents assume is safe for a newborn.
Skin to skin contact during feeds, plus the extra body heat of holding a baby against you for 30 or more minutes, adds warmth fast, so err slightly cooler in the room rather than warmer. A small fan on low, pointed away from direct airflow onto your baby, keeps air moving without creating a draught. Stuffy, unventilated rooms also make you drowsy during long night feeds, which isn’t ideal when you’re holding a baby.
If your feeding chair sits near a window, check for draughts in winter and direct sun in summer. Both throw off the room’s actual temperature compared with what the thermostat reads. A light muslin wrap over your baby’s legs handles minor chill without overheating them, and it’s easier to add or remove than adjusting the whole room.
Ventilation matters as much as temperature. A room with fresh airflow, even just a cracked window during the day, keeps you more alert through repeated night feeds and reduces the stuffy, heavy air that builds up in a closed nursery over a few hours.
How do you get privacy and quiet in a shared home?
Feeding in a busy household means negotiating privacy without isolating yourself in a room for hours a day. A simple throw or nursing cover draped over your shoulder handles unexpected visitors or older siblings wandering in, without needing a dedicated closed door every time.
If your workstation sits in a shared living space, a folding screen or a strategically placed bookshelf creates a visual boundary without a full renovation. Some mums prefer setting up in a bedroom corner specifically because a door that closes gives a clean break from household noise, particularly during a baby’s fussier evening feeds.
Noise is worth managing separately from privacy. A white noise machine or even a phone app playing steady static can mask household sounds, television, other kids, a barking dog, that otherwise startle a feeding baby mid latch. Keep the volume low enough that you can still hear your baby clearly; the goal is smoothing sharp noises, not drowning everything out.
If you share a home with other adults, a simple signal, a closed door, a sign, a text in the family group chat, saves you from constant interruptions. Toddlers and older children generally respond well to a specific “feeding time” cue they can recognise, especially once it’s part of a predictable routine rather than a surprise every time.
How do you avoid fatigue during long feeding sessions?
Fatigue during feeding usually builds from small postural compromises repeated dozens of times a day, not one big mistake. Your workstation should let you fully release tension, not just get through the feed.
A chair with proper arm support matters more the longer your feeds run, since your arms and shoulders otherwise carry a baby’s full weight unsupported for 20 to 40 minutes at a stretch. A stable, correctly elevated pillow reduces that load by taking the weight off your arms and letting your shoulders drop into a natural, relaxed position instead of hiking up defensively.
Alternate sides and positions across the day rather than always feeding from the same side in the same chair. Repetition in exactly the same posture, feed after feed, is what turns a minor ache into a genuine problem by week six. Keep a small cushion nearby to prop under your feeding side elbow partway through longer sessions, and get up and stretch between feeds where you can, even just rolling your shoulders back a few times.
If you’re feeding through the night, resist the urge to slump on the edge of the bed “just for a few minutes.” Sitting fully back with support, even briefly, protects your back far more than a quick, unsupported perch does, and it takes no longer to settle into properly.
What’s the best way to store breastfeeding supplies?
Everything you reach for mid feed should live within arm’s length of your chair, because getting up with a latched baby isn’t realistic. A small caddy, basket, or over-the-arm organiser keeps nipple cream, breast pads, a spare muslin, and your phone charger in one spot instead of scattered across the room.
Stock two sets of supplies if your feeding spot changes between day and night, one bedside and one in your main living area, rather than carrying the same basket between rooms at 3am. Nappies and a change mat nearby make sense too, since babies often need a change either just before or just after a feed.
A rolling cart works well if your workstation moves between rooms depending on the time of day; it holds more than a basket and wheels wherever you settle. For smaller setups, a wall mounted shelf above the chair or an over-door organiser frees up floor space entirely, which matters if your feeding corner doubles as a nursery, spare room, or living area corner.
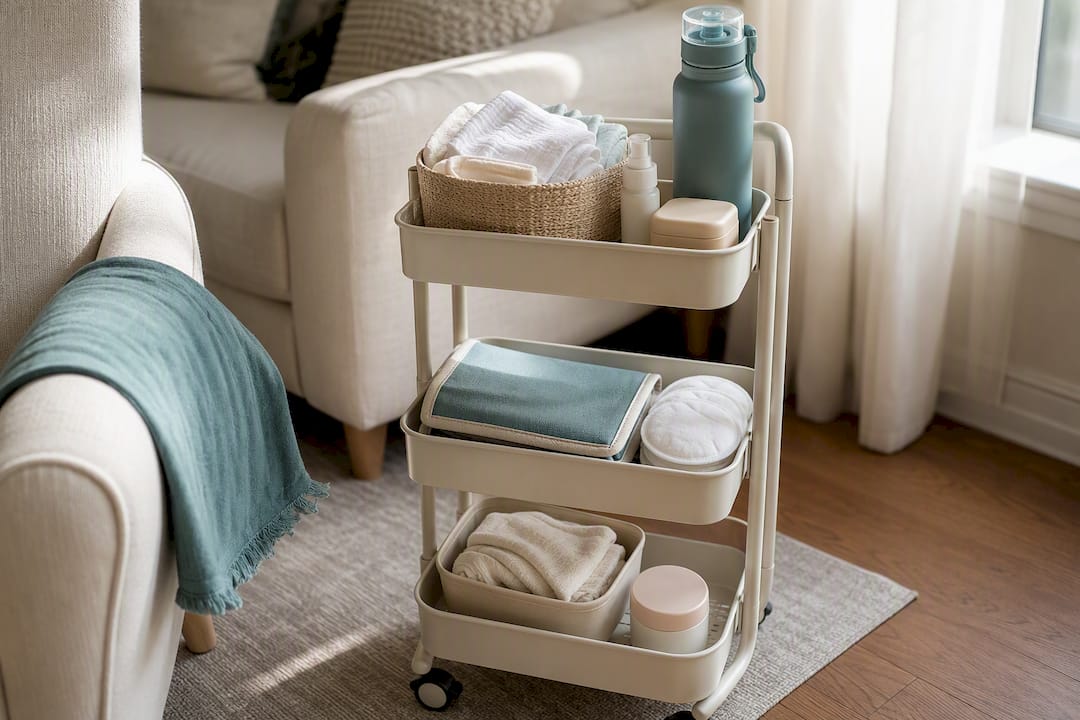
Keep water and a snack in the mix too. Restocking your basket once a day, rather than hunting for supplies mid feed, is the difference between a workstation that actually works and one that just looks organised.
A closer look at the ergonomics behind the setup
Working through this guide, one thing stands out: almost every genuine improvement traces back to height and stability, not to how many extras you add to the space. A pillow that holds its lift under a baby’s real weight does more for your neck and shoulders than a lamp, a cart, or a perfectly stocked basket ever will.
That’s the reasoning behind features like lift and stronger compression resistance in a nursing pillow, keeping the shape that a softer pillow loses within weeks, so a mother doesn’t quietly start leaning forward again without noticing. A washable cover matters too, for the practical reason that this corner of the house gets used daily and needs to stay properly clean.
For a fuller look at posture through a whole feeding session, the ergonomics of breastfeeding guide walks through positioning in more depth, and the step-by-step pillow setup post has photos showing exactly how the alignment should look before you settle in for a feed.
— Marietjie
Setting up your pillow the right way
Everything in this guide points to one piece of gear doing most of the work: a pillow that holds its height and doesn’t collapse the moment your baby settles onto it. That’s exactly what the Zabbidoo nursing pillow is built for, with an 18cm lift that brings your baby to breast height instead of asking you to hunch down, and stronger compression resistance so it keeps that shape feed after feed rather than flattening out within weeks.

Before you buy any nursing pillow, run it against a short checklist: does it hold real height under weight, is it firm rather than squishy, does it have a strap or handle to stop it sliding, and is the cover machine washable for the daily wear a feeding corner gets. A hypoallergenic linen cover ticks that last box, and the built-in pocket and portable handle mean the pillow moves with you from the nursery to the couch to a friend’s place without extra bags. Head to the nursing pillow product page to check sizing and get one set up before your next feed.
Sources
For the clinical detail behind the comfort and latch claims above, the breastfeeding pillow discomfort trial and the LATCH score study are worth a read. For practical setup photos, see the comfort steps guide and the small-space nursing setup post.
- The Use of Breastfeeding Pillow to Reduce Discomfort for Breastfeeding Mothers
- Breast-feeding: Caring for your baby
- How to choose a nursing pillow and use it safely - Consumer Reports
- The influence of ergonomic breastfeeding training on some health parameters in infants and mothers