

Try a laid-back or football hold first, and lift your baby to the height of your resting nipple using a firm pillow or rolled towel rather than hunching down to meet them. Breast size has nothing to do with how much milk you make, and most early struggles come down to positioning and latch, not supply. If pain, cracked nipples, or a shallow latch persist past a few days, call an IBCLC or your local breastfeeding helpline.
TL;DR:
- Proper positioning and support, such as a firm pillow that maintains shape, are essential to prevent arm fatigue and ensure a good latch with larger breasts.
- Breast size does not affect milk supply, but correct latch and positioning are critical to avoiding nipple pain and reducing shallow attachment issues.
- The most effective holds for bigger breasts include cradle, football, and laid-back positions, which help you see the latch clearly and keep the baby’s nose free.
- Using support tools like a purpose-built nursing pillow or rolled towels stabilizes the breast height, minimizes readjustments, and promotes a comfortable feeding rhythm.
- Consulting a lactation professional early and adjusting support setups can resolve persistent pain or latch issues in the first week or two.
Table of Contents
- Breastfeeding positions that work best for larger breasts
- How to help your baby attach and latch with larger breasts
- Setting up stable support so your arms don’t give out first
- Comfort, clothing and bras that stop the strain
- Feeding away from home and lying-down nursing safety
- What lactation consultants and experienced mums actually recommend
- A comfort-first approach to breastfeeding with larger breasts
- An ergonomic nursing pillow worth considering
- Where to find more support
- Sources
Breastfeeding positions that work best for larger breasts
Positioning is the single biggest lever you have. Get the height and angle right, and half the battle with large breasts breastfeeding support is already won. The Australian Breastfeeding Association points to cradle, football, and laid-back holds as the three that consistently work best for mums with fuller breasts, mainly because each one gives you a clear line of sight to the latch and keeps bub’s nose free to breathe.
Here’s how to set each one up properly.
-
Cradle and modified cradle hold. Sit upright with a firm cushion under your forearm, not just under the baby. The pillow should bring your baby level with the nipple so you’re not curling your spine to reach down. In the modified version, you support the head with the opposite hand (right hand for the left breast), which gives you more control over the angle of approach during those first tricky weeks.
-
Football (rugby) hold. Tuck your baby under your arm on the same side as the breast you’re feeding from, feet pointing towards your back. This position keeps the weight of the breast off your baby’s face entirely, and it’s often the easiest one to manage one-handed once you’ve got the hang of it. Mums recovering from a caesarean also find it comfortable because there’s no pressure on the abdomen.
-
Laid-back or biological nurturing. Recline back at roughly 45 degrees, baby tummy-down on your chest. Gravity does most of the work here: your breast falls to a natural, accessible angle and your baby can burrow in and self-attach without you needing to hold the breast at all. This is one of the most underrated options for larger breasts because it removes the constant hand support that causes arm fatigue in upright holds.
-
Side-lying. Lie on your side with your baby facing you, and let the mattress take the weight of the breast instead of your arm. A rolled towel behind your baby’s backstops them rolling away mid feed. This position is a genuine relief after a caesarean birth, when sitting upright for long stretches is uncomfortable.
Whichever hold you choose, check three things before you settle in: your baby’s chin is touching the breast, the nose sits clear of tissue, and you can hear rhythmic sucking and swallowing rather than rapid, shallow sucks.
Pro Tip: If you find yourself resettling every few minutes, the problem is usually the support, not the position. Swap a soft cushion for something firmer before you swap holds entirely.
How to help your baby attach and latch with larger breasts
A deep latch depends on shaping the breast correctly and bringing your baby to it, not the other way around. The C-hold is the standard technique: place your thumb on top of the breast and fingers underneath, well back from the areola, then gently compress to create a shape roughly the size of your baby’s mouth. Some mums use a “sandwich” technique, flattening the breast slightly in the direction of the baby’s mouth to help them take in more than just the nipple.
The key mistake to avoid is squeezing too close to the areola. That compresses the milk sinuses right where your baby needs to draw milk from, which can restrict flow and leave you sore for no good reason.
Bring your baby to the breast, chin first, rather than leaning your body towards them. A mirror propped nearby for the first week or two helps you check the latch angle without craning your neck, and having a partner or support person watch from the side can catch positioning issues you can’t see yourself.
Signs the latch is working:
- Baby’s chin presses into the breast and their nose stays clear.
- Lips are flanged outward, not tucked in.
- You hear slow, deep swallows rather than rapid clicking.
- Feeding is comfortable after the first few sucks, not sharp or pinching throughout.
Clinical guidance on breastfeeding mechanics backs this up: shallow attachment and poor latch depth are the main drivers behind nipple pain and reduced milk transfer, not the size of the breast itself. If a feed hurts the whole way through, break the latch gently with a clean finger and start again rather than pushing through.
Setting up stable support so your arms don’t give out first
The weight of a larger breast pulling on the latch mid feed is one of the most common reasons babies slip down to a shallow, painful attachment. Elevating the baby to your resting nipple height with a stable support stops that drift before it starts, and it also stops you from hunching your shoulders forward to compensate.
In the first days home, household items work fine as a stopgap. A rolled muslin cloth or small hand towel tucked under the breast, or even a soft scarf looped like a necklace to take some of the weight, can buy you comfort while you work out what you actually need long term. These are genuinely useful short-term fixes, not a compromise.
The catch is that soft cushions and folded towels tend to flatten under sustained weight, which means you end up repositioning every few minutes, and that constant readjustment is exactly what breaks a good latch rhythm. A purpose-built nursing pillow avoids that problem if it holds its shape under load. When you’re testing one, check:
- Lift height. It needs to bring your baby up to nipple level, not halfway there.
- Compression resistance. Press down firmly. If it flattens out, it will flatten under a real feed too.
- Stability. The pillow shouldn’t shift or rotate as your baby moves.
- A washable cover, because spills and leaks are a daily reality.
If you’re pumping as well as feeding, standard flange sizes often don’t fit comfortably on larger breasts or wider nipples, so it’s worth getting properly sized rather than assuming the one that came in the box is right. Nipple shields are sometimes suggested for very shallow latches, but they’re best tried with guidance from an IBCLC rather than as a first move.
Pro Tip: Set up your whole station before you sit down: pillow under the baby, a footstool if your chair is too high, a spare muslin within reach. Chasing supplies mid feed is how good positioning falls apart.
Comfort, clothing and bras that stop the strain
Feeding comfort isn’t just about the latch. It’s about what happens to your neck, shoulders and back over the twenty-minute stretches you’re sitting still, several times a day.
A well-fitted nursing bra makes a genuine difference, and it’s worth getting refitted a few weeks postpartum since breast size and shape-shift once your milk comes in. Check for:
- No underwire digging in, especially near the outer edge where blocked ducts often start.
- Straps that don’t cut into your shoulders under the extra weight.
- Cups that support fully without compressing breast tissue.
The two-shirt method, a fitted singlet under a looser top, gives you easy access without exposing more than you want to, and it works just as well at home as it does out and about.
Chair choice matters more than people expect. A chair with proper back support and armrests takes the load off your shoulders during long feeds, and a footstool that brings your knees slightly above hip height reduces the strain on your lower back. If you’re feeding without armrests, that’s often where the fatigue that people blame on “cluster feeding” is actually coming from.

Persistent pain, red or firm patches suggesting a blocked duct, or nipple damage that isn’t healing are signs it’s time to get checked, not push through.
Feeding away from home and lying-down nursing safety
Feeding in public doesn’t have to mean exposing more than you’re comfortable with, and side-lying feeds don’t have to feel risky if you set them up properly.
-
Side-lying checks. Keep your baby facing you, nose clear of the mattress and breast, with a rolled towel behind their back for support. Never feed lying down on a sofa or with loose bedding nearby, since that increases suffocation risk.
-
Semi-reclined in public seating. A laid-back position works in a café chair or car seat just as well as at home, since it uses gravity rather than your arms to hold the position.
-
Discreet layering. The two-shirt method covers you from underneath while your baby feeds, and a light wrap over the shoulder adds privacy without blocking your view of the latch.
Before any feed away from home, do a quick check: is the surface stable, is baby’s airway clear, and can you see their face the whole time.
What lactation consultants and experienced mums actually recommend
Small technical details separate a comfortable feed from a painful one, and they’re the kind of thing you only pick up from someone who has done this hundreds of times, or done it herself more than once.
A high-lift pillow that doesn’t collapse under weight beats a flat cushion every time, because passive support means you’re not using your arm muscles to hold position for twenty minutes straight. Keep C-hold fingers well behind the areola, tilting the nipple slightly upward rather than squeezing near the base, which protects the milk sinuses from compression. And if pain or a poor latch continues past the first week, that’s the point to call an IBCLC rather than wait it out.
An initial IBCLC consultation usually involves watching a full feed, checking your baby’s mouth and tongue movement, and adjusting your positioning hands-on. Many mums say that one session resolves in twenty minutes what weeks of guesswork couldn’t.
A comfort-first approach to breastfeeding with larger breasts
Positioning always beats persistence. If a hold hurts, the fix is rarely gritting your teeth through it, it’s changing the setup: height, angle, or support. Protecting your own posture matters just as much as protecting the latch, because a mum with a sore neck and aching shoulders doesn’t feed comfortably for long, no matter how good the technique.
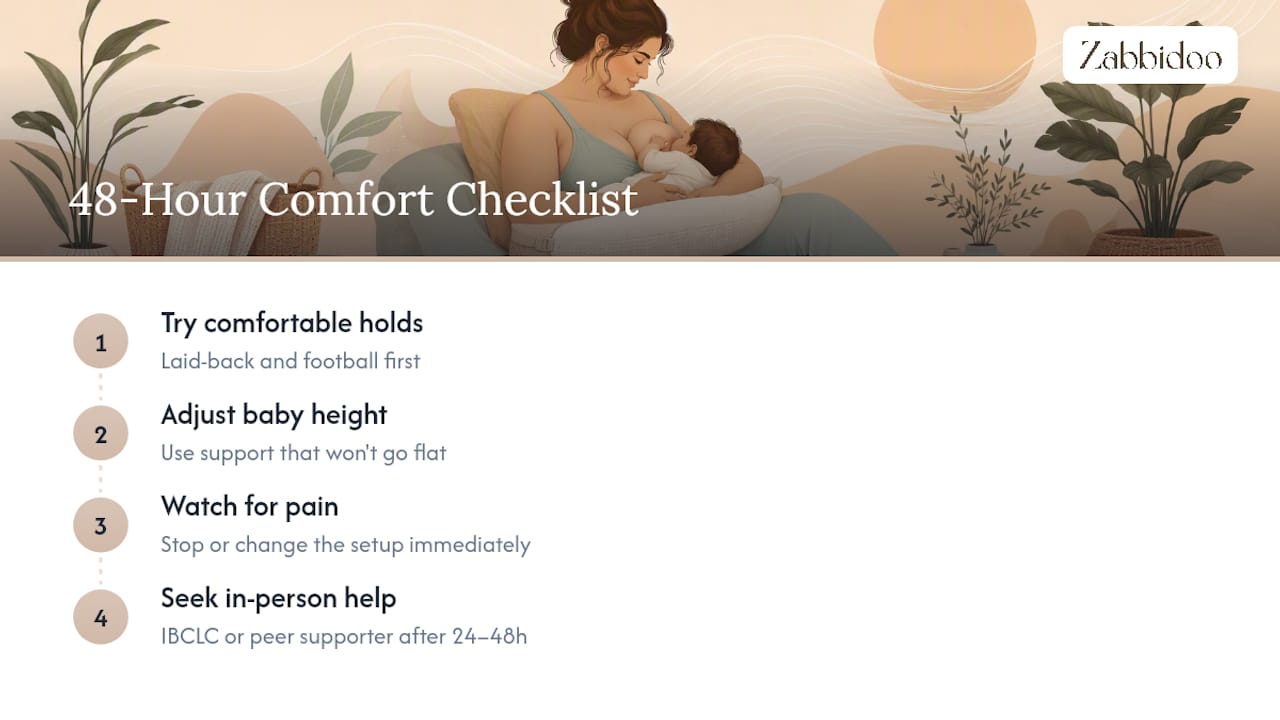
My honest suggestion for the first 48 hours is a short, deliberate checklist: try laid-back and football holds before anything else, get your baby’s height sorted with a support that won’t go flat on you, watch for pain at any point in the feed, and if something still feels wrong after a day of genuine effort, get an IBCLC or peer supporter to watch a feed in person. Nobody figures this out entirely alone, and asking early saves weeks of unnecessary discomfort.
— Marietjie
An ergonomic nursing pillow worth considering
If soft cushions and rolled towels keep flattening mid feed, the problem usually isn’t your technique, it’s your support. Zabbidoo built its nursing pillow around one specific gap: most pillows on the market compress under real weight, forcing you to hunch forward to reach your baby instead of bringing your baby up to you.

The Zabbidoo pillow uses a lift height designed to bring your baby to resting nipple level rather than the other way around, with compression resistant fill that holds its shape through a full feed instead of sinking after ten minutes. The cover is hypoallergenic French flax linen, fully machine washable, and it comes with a built in pocket and carry handle for feeds away from home. Before you buy any nursing pillow, check the same three things we covered earlier: lift height, firmness under load, and a washable cover. If towels and cushions haven’t solved your positioning struggles, it’s worth viewing the nursing pillow and comparing it against what you’re currently using.
Where to find more support
- Australian Breastfeeding Association helpline and large-breast specific guidance.
- LCANZ directory to find a certified IBCLC near you.
- Posture support for ongoing neck and shoulder strain from feeding.
This article is general information, not a substitute for advice from a qualified doctor. Consult a qualified healthcare professional about your own circumstances before acting on anything here.
Sources
- Breastfeeding with large breasts | Australian Breastfeeding Association
- Healthdirect – Australian Breastfeeding Association partner guidance
- PubMed Central article on breastfeeding mechanics